
Petoi Coding Blocks
How to use the extension library specially developed for the Petoi robot in Mind+
Prepare Mind+
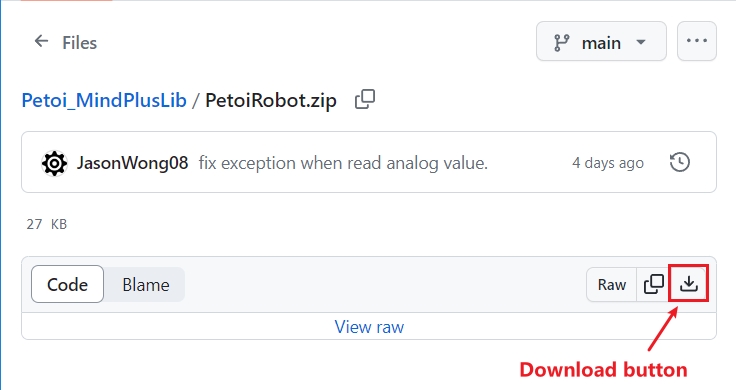
Download the latest version from Github
If you cannot download the software from Mind+'s official website, you can download a stable version from the Google Drive folder. However, we strongly recommend that you download and use the official latest version.
After the installation is complete, you can open Mind+
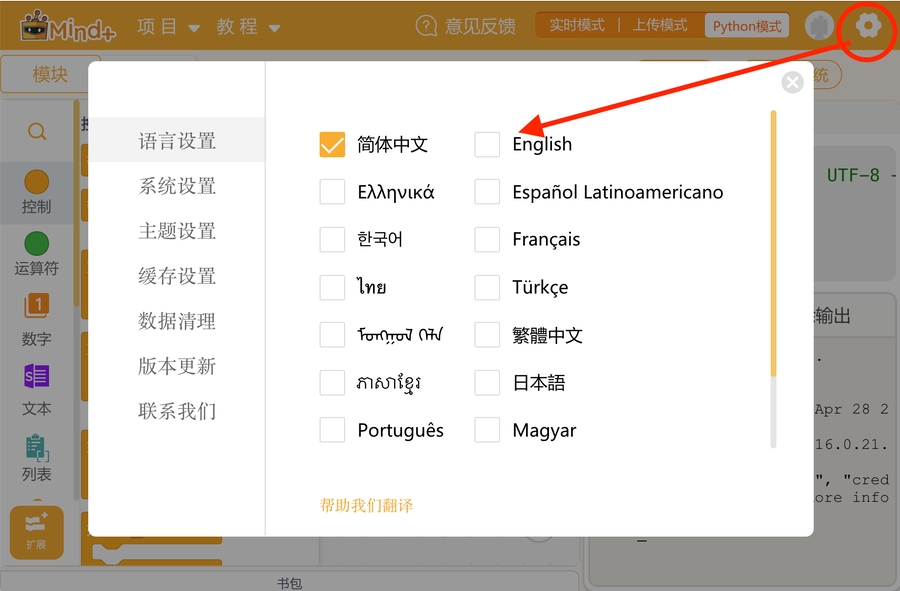
If the default installation language is Chinese, you can switch to English as follows:
Watch the video tutorials
We provide a series of video tutorials on using Petoi Coding Blocks with the free Scratch-like robotics coding curriculum. Be sure to click next to go through all the videos.
Prepare Petoi Robot
Please follow the instructions in the subpages to prepare according to the robot's mainboard.
For BiBoard products, such as Bittle X (BiBoard V0), Bittle X V2 (BiBoard V1), Bittle X+Arm (BiBoard V1), and Nybble Q(BiBoard V1), no software modification is required. By default, all functional blocks in Mind+ are supported.
Plug in the battery to the BiBoard, install it in the chassis, and long-press the battery button to power on the robot.
Connection method
Wired connection: The kit includes a USB Type-C data cable connecting the robot's mainboard to the computer.
Wireless connection (Bluetooth): The motherboard's built-in Bluetooth communication module allows you to establish a wireless connection between the robot's mainboard and the computer.
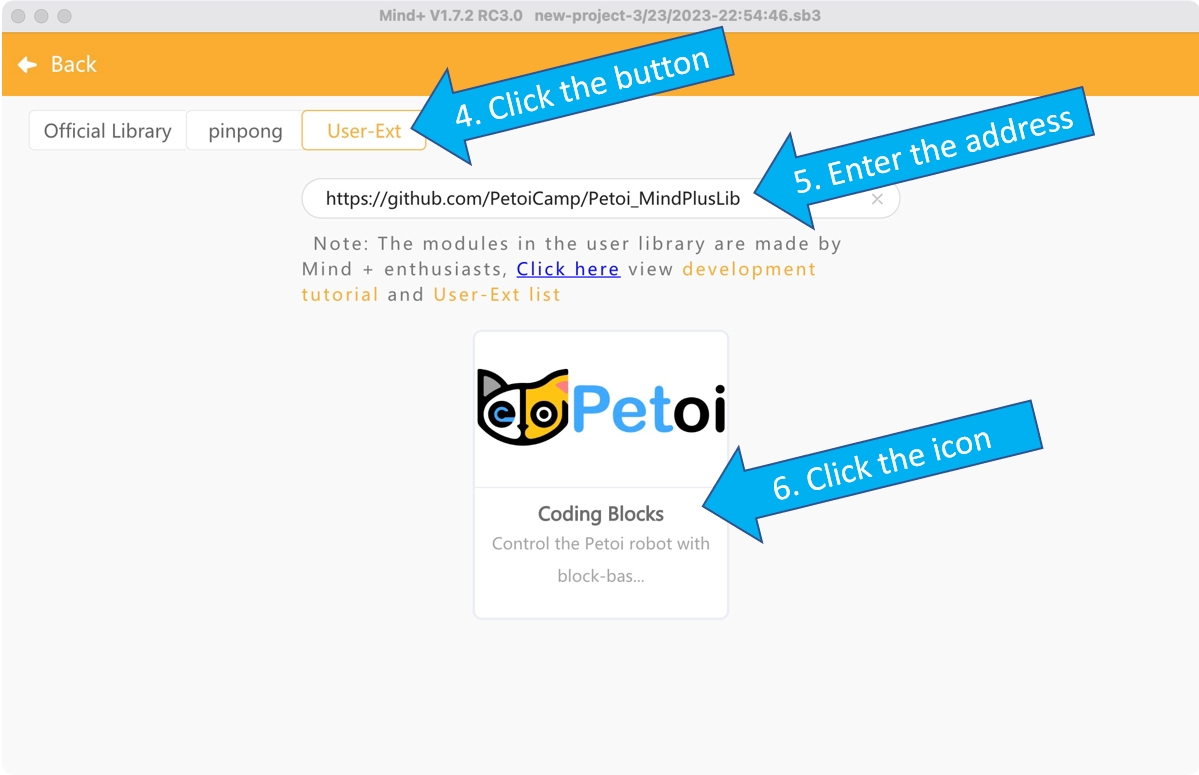
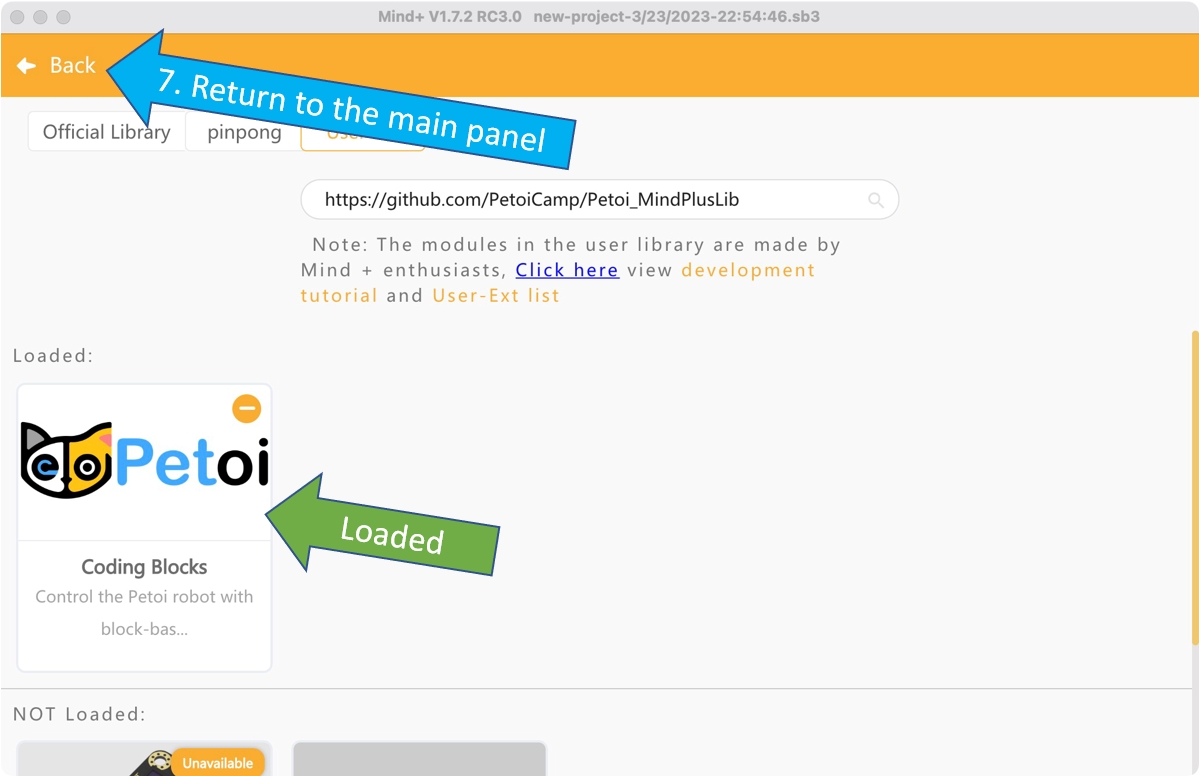
Import Petoi Mind+ extension library
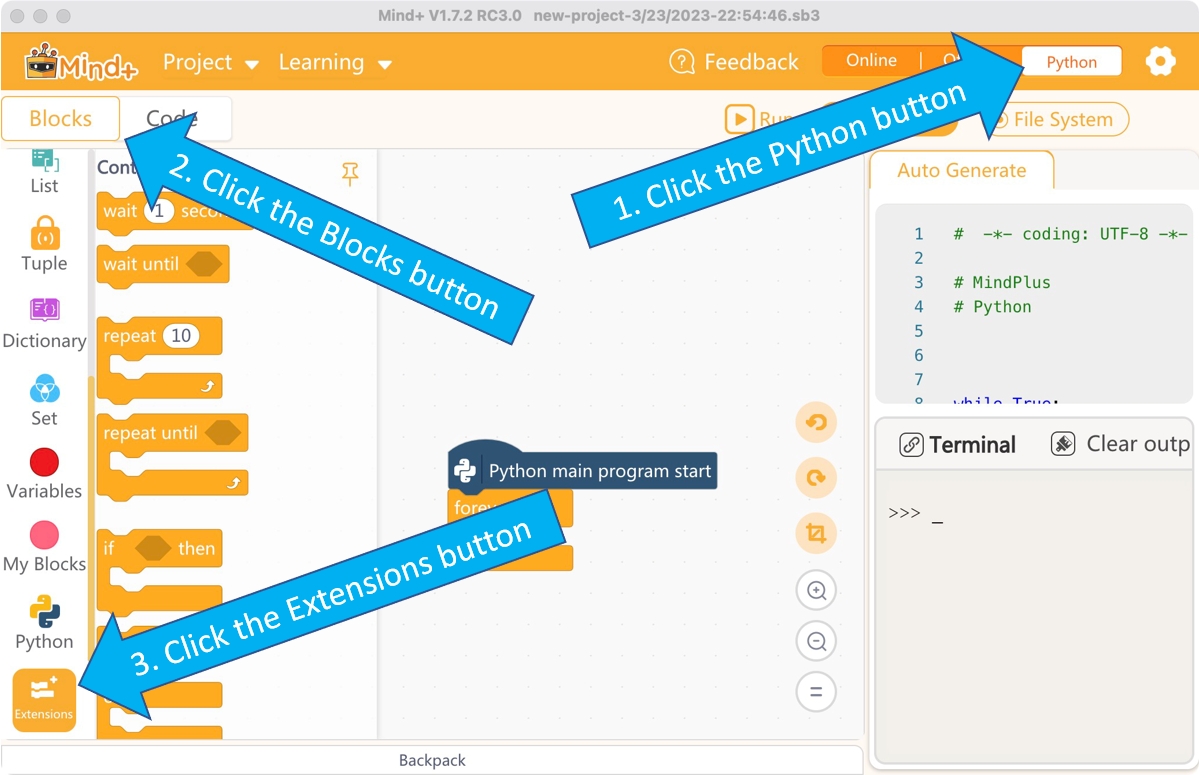
Paste the GitHub URL(https://github.com/PetoiCamp/Petoi_MindPlusLib) in the text box of the import interface:
For macOS (if the installed Mind+ version <= V1.7.2 RC3.0), you need to download PetoiRobot.zip and copy the extracted folder (PetoiRobot) to /Users/{your username}/Documents/mindplus-py/environment/Python3.6.5-64/lib/python3.6/site-packages/
You can also download the latest extension library file (*.mpext) from the GitHub repository. And then import it as follows:


Programming and Running
Petoi Coding Blocks is a user-extended library of Mind+.
If you open Mind+ by double-clicking the icon , it will not automatically load this extension library, and you need to re-import it manually every time you open the app.
If you open Mind+ by double-clicking the code file(suffix mp or sb3) that uses this extension library or load these code files after opening Mind+, Mind+ will automatically load this extension library.
The principle and process
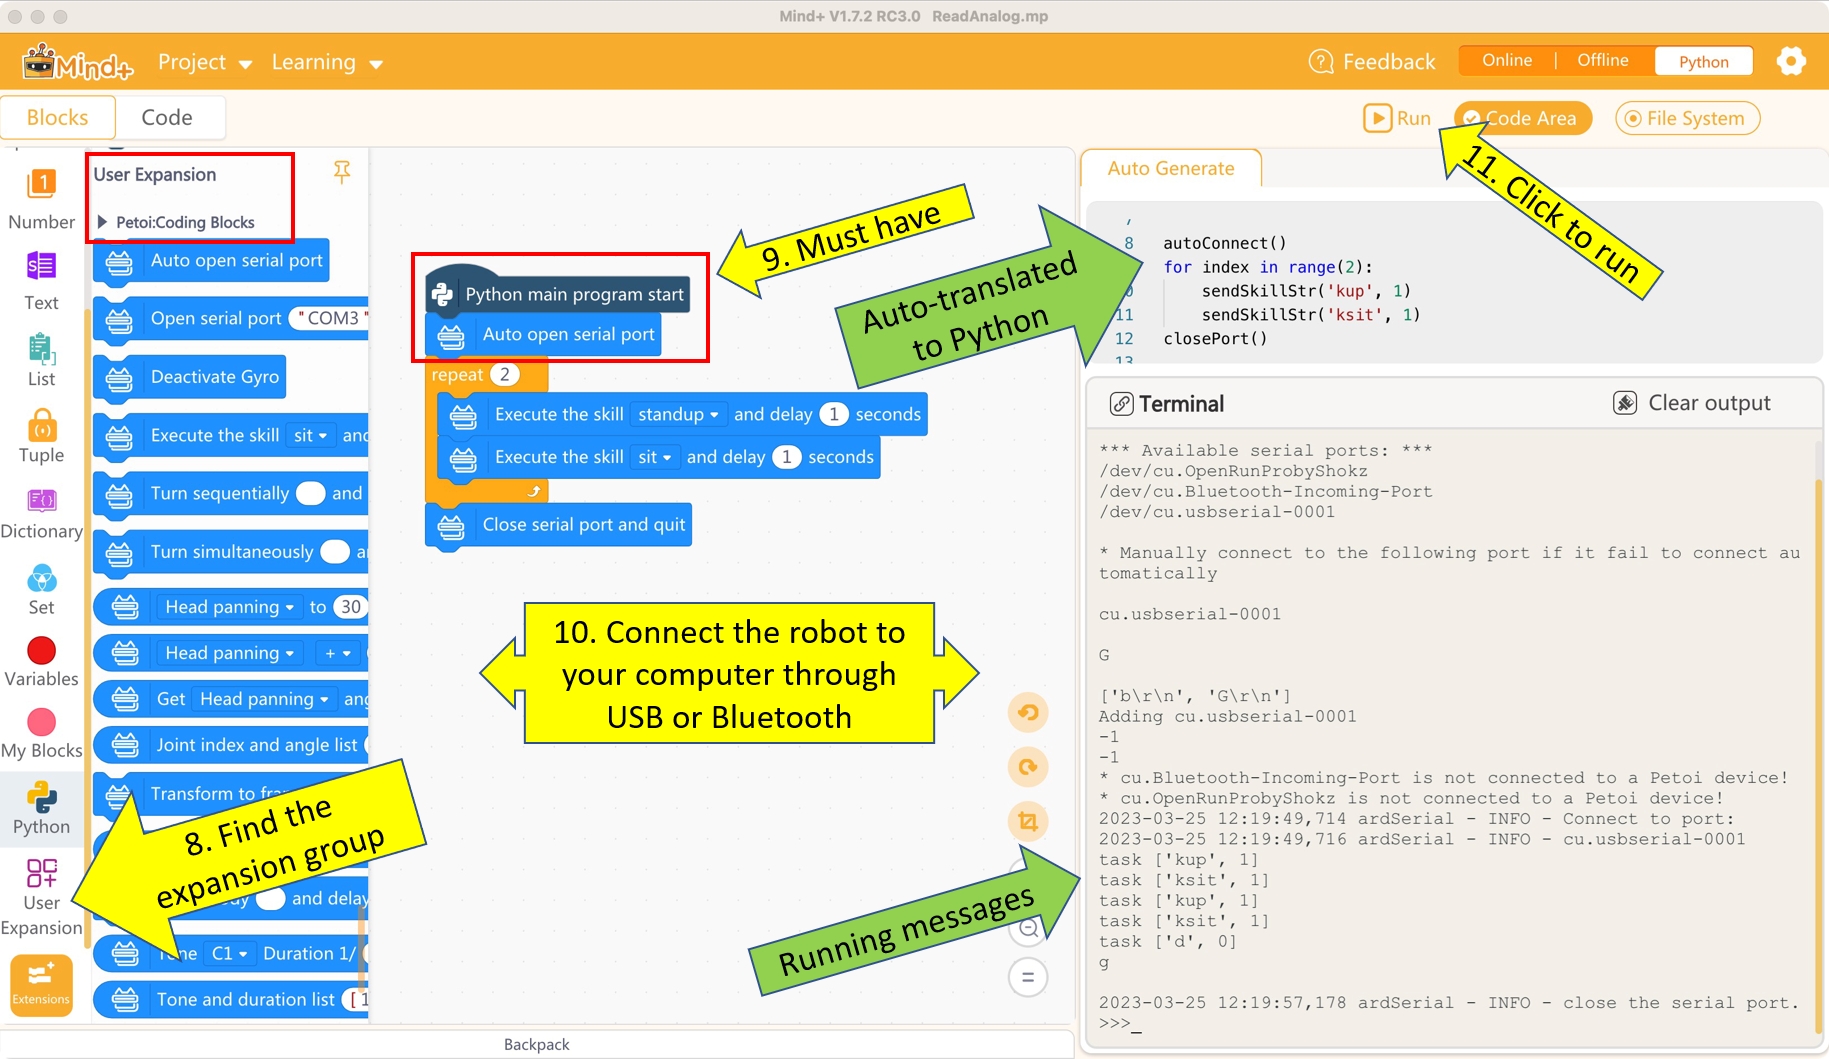
This extension library can control the robot without compiling and uploading the code to the robot's main board. Click the "Run" button directly to run the program on the Python level and send instructions to the robot's serial port. If you need to stop the program while running, you can click the "Stop" button anytime. The process of the program can be divided into three steps:
Open the serial port
Control the robot
Close the serial port
The instructions for blocks
Open the serial port
There are two ways to open the serial port:
Automatically identify and open the serial port

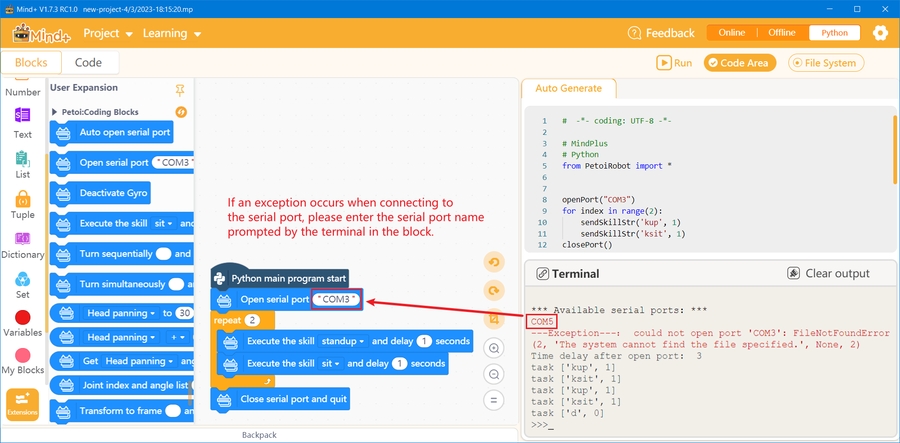
Enter the name of the serial port to open the serial port

If it fails to open the serial port, you can refer to the printed information in the terminal window to replace the name of the serial port:
Perform inherent skills

Use this block to let the robot perform skills pre-built on the robot's main board. Skills from "sit" to "zero" are postures (containing only one action frame). Skills from "boxing" to "sniff" are behaviors (containing multiple posture frames and are performed only once). Skills from "stepping" to "trotRight" are gaits (containing multiple posture frames, and are repeated in periodical loops until stopped).
After finishing the current block's task, the program will wait a short time (delay xx seconds) before moving to the next block.
Perform the last skill exported from the Skill Composer

Use this block to let the robot perform the last skill exported from the Skill Composer.
Perform the skill in the file

Use this block to let the robot perform the skill in the skill files, which are in the following directory:
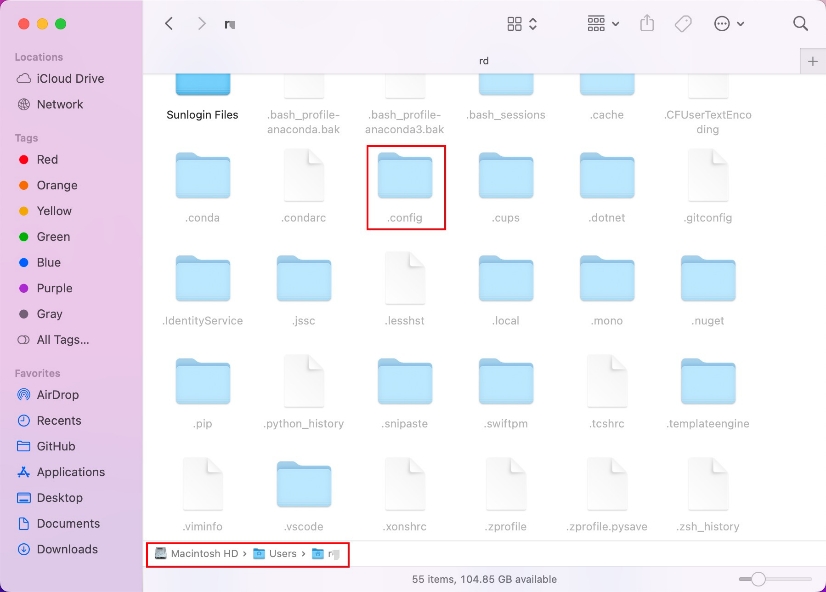
Windows: C:\Users\{your user name}\.config\Petoi\SkillLibrary\{model}
MacOS : /Users/{your user name}/.config/Petoi/SkillLibrary/{model}
Linux: /home/{your user name}/.config/Petoi/SkillLibrary/{model}
The folder name {model} is Bittle or Nybble. When exporting a skill file from the Skill Composer, it will automatically save the skill file to this directory.
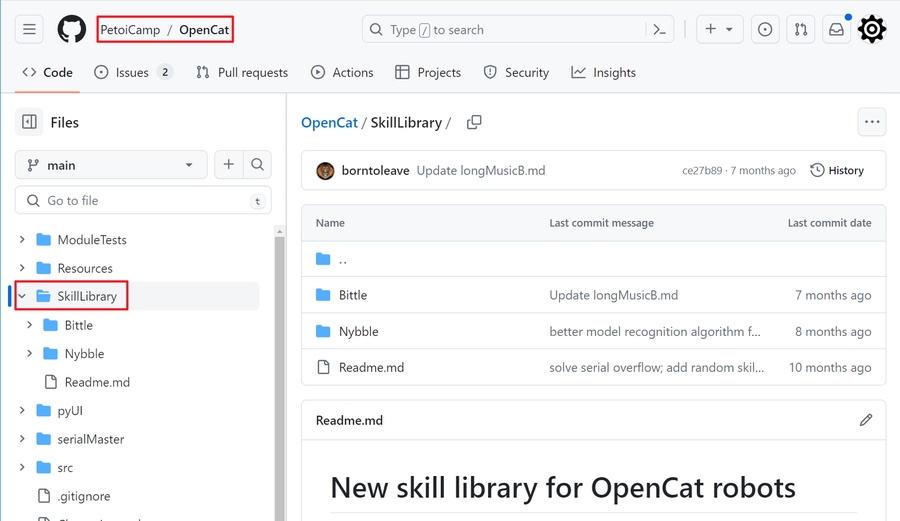
Tips: you can also copy & paste the SkillLibrary folder from the source code of the OpenCat project on GitHub to the .config/Petoi directory. Therefore, you can use some sample skills for your Mind+ program, and there is no need to use the export function in the Skill Composer.
The folder .config is a hidden directory on MacOS/Linux but can be visited in the terminal or through a specific view setting:
MacOS open the directory /Users/{username} in Finder, then press the “Command” + “Shift” + “.” (period) keys at the same time.
Rotate joints in a sequence.

Use this block to control one joint or multiple joints to rotate in sequence. There are several ways to use the blocks for reference:
Controls individual joint rotations to an absolute angle value.

Controls individual joint rotations to a relative angle value.

Control multiple joints to rotate sequentially to absolute angle values or relative angle values.

Use the joint angle list to control multiple joints to rotate to absolute angle values in a sequence.

 ,
,  represents a list consisting of a joint index and an angle value. For example, [Head panning to 30 degrees] represents the list [0, 30].
 It consists of one or more pairs of joint index + angle value, and the specific format is as follows:
[joint index, angle value, joint index, angle value...]
It consists of one or more pairs of joint index + angle value, and the specific format is as follows:
[joint index, angle value, joint index, angle value...]
Rotate joints simultaneously

Using this block can control multiple joints to rotate at the same time. There are several ways to use the blocks for reference:
Control multiple joints to rotate to absolute angle values or relative angle values at the same time

Use the joint angle list to control the simultaneous rotation of multiple joints to absolute angle values.

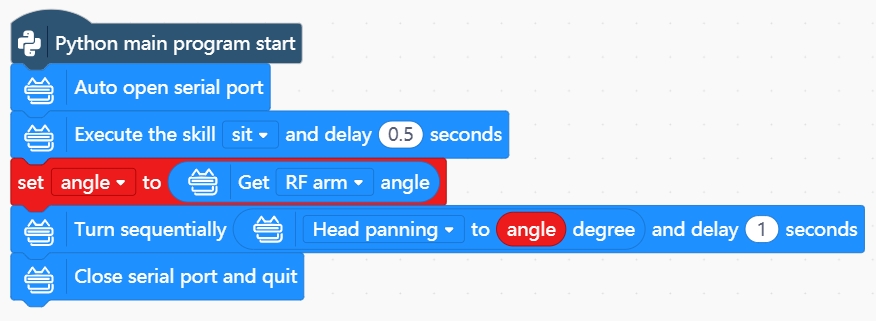
Get the current angle value of a joint.

Use this block to get the current angle value of the selected joint. It is recommended to assign it to a variable first and then use the variable and algorithm to control other joints to rotate.
Demo code
Transform to frame

Use this block to control all joints to rotate at the same time. Please use it with the "Action frame" block. As shown below:

Play a melody

Use this block to control the robot to play music. There are several ways to use blocks together for reference:
A list made up of multiple "Tone + Duration" blocks

Using a tone duration list


Consists of one or more pairs of Tone + Duration, the specific format is as follows:
[tone, duration, tone, duration, tone, duration...]
Execute a serial command

Use this block to send a serial command to the robot, which can provide you with more and more flexible control methods. For example, you can input "kkcL" (kick the left front leg), and "khiR" (raise the right front leg to say hello). For more serial port commands, please refer to the serial protocol.
Write analog value

Use this block to write an analog value to a specified pin. Analog value range: 0~255
Read analog value

Use this block to read an analog value from a specified pin.
Write digital value

Use this block to write a high/low-level value to the specified pin. High-level: 1; Low-level: 0.
Read digital value

Use this block to read the high/low-level value of the specified pin.
Read Ultrasonic sensor distance

Use this block to read the distance value from the ultrasonic sensor.
For the Petoi RGB Ultrasonic Sensor (or RUS-04), you can set the two pins ( Trigger and Echo) like this:
NyBoard (connects to the D6 and D7 pins)

BiBoard (connects to the Rx and Tx pins)

For other ultrasonic sensor models (e.g., HC-SR04 connects to the D6 and D7 pins), you can set the two pins like this:

Demo code
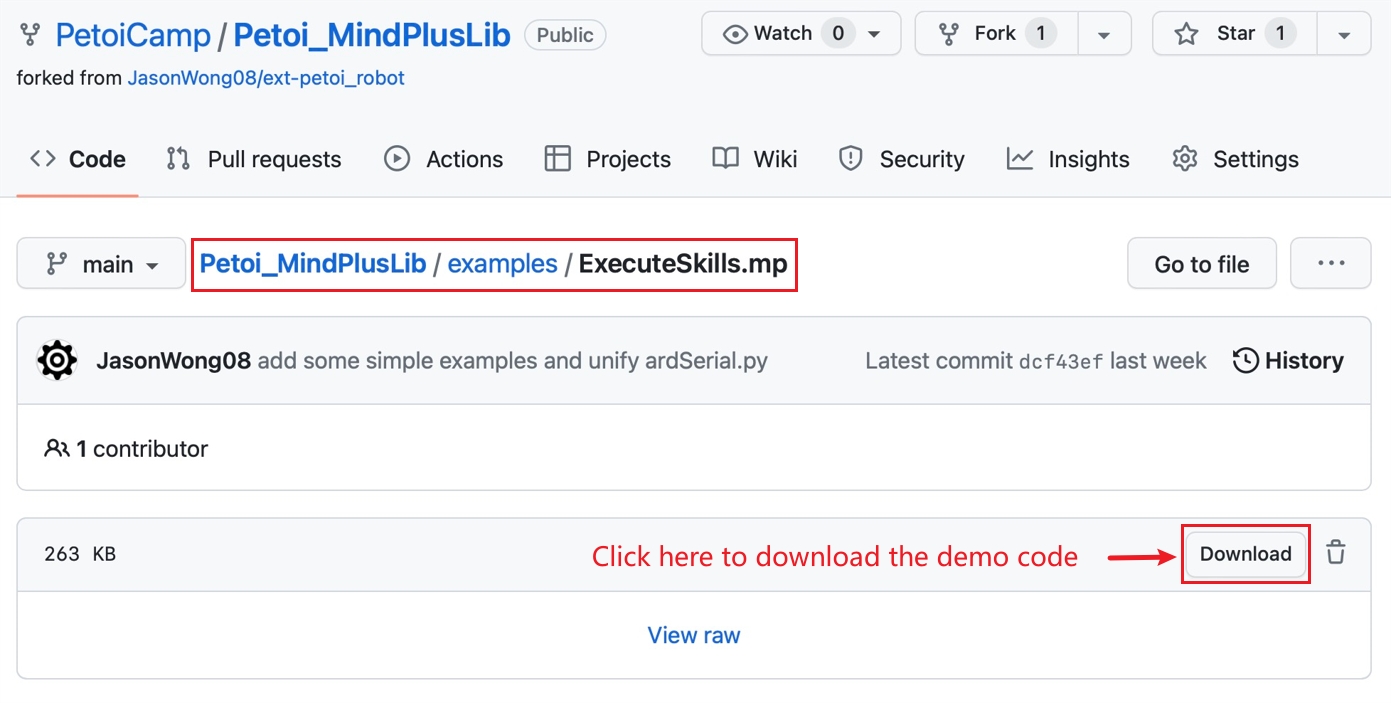
You can download the demo code from the GitHub repository.
NyBoard examples/NyBoard/avoidObs_NyBoard.mp
BiBoard examples/BiBoard/avoidObs_BiBoard.mp
Read the target coordinates

Use this block to Read the coordinates of the identified target from the camera module(MU camera / Petoi AI Vision module) which connect to the BiBoard.
Demo code

You can download this test code (testCamera.mp) and run in the Mind+.
Close the serial port

Generally, at the end of the program, it is recommended to use this block to close the serial port communication.
Demos
We provide some demos to download for reference in the GitHub repository (Petoi_MindPlusLib/examples).
Free curricular
Last updated