
Upload Firmware Using Arduino
This firmware upload method is intended for users familiar with Arduino IDE. For general users, please refer to the previous page: Upload Firmware Using Petoi Desktop APP. If you have already uploaded the firmware successfully, please proceed to the next page: Get Started: Create Your First Block Program.
Set up BiBoard
Prepare the ESP32 development environment
Open “Preferences” in Arduino IDE, add ESP32 development board URL:
https://raw.githubusercontent.com/espressif/arduino-esp32/gh-pages/package_esp32_index.json


Click OK to save it and then exit.
Open “Boards Manager...” and wait for updates from external board support links. Search “esp32” and install the support package.
Please install the latest available version 2.0.12. Installing version 2.0.13 and above may cause the motherboard to fail to startup.


After showing “INSTALLED”, the BiBoard board support package is finished.
Modify the code file in the package
For Windows: C:\Users\{username}\AppData\Local\Arduino15\packages\esp32\hardware\esp32\2.0.*\tools\sdk\esp32\qio_qspi\include\sdkconfig.h
For Mac: /Users/{username}/Library/Arduino15/packages/esp32/hardware/esp32/2.0.*/tools/sdk/esp32/qio_qspi/include/sdkconfig.h
For Ubuntu: Arduino root directory/.arduino15 (hidden file)/packages/esp32/hardware/esp32/2.0.12/tools/sdk/esp32/qio_qspi/include/sdkconfig.h
Append a line of code at the end of the file:
Set up the board options
Please set up the board's upload speed, CPU frequency, etc, as shown in the picture below.

Choose hardware partition
The BiBoard V0 uses an ESP32 with a 16M flash. To simplify, you can use the default 4 MB partition map without a problem. There's plenty of programming space for the standard OpenCatEsp32 firmware.
The BiBoard V1 uses an ESP32 with a 4M flash.
4 MB partition
You can use the Minimal SPIFFS (1.9MB APP with OTA/190KB SPIFFS). You can also use other partition schemes under the 4 MB flash limit, such as "No OTA" or "Huge APP".

16 MB partition
Suppose you want to fully utilize the 16 MB flash on BiBoard V0 (it's unnecessary and takes longer to upload). You can read the user manual for the Add hardware partition configuration option in Arduino IDE.
Download the source code and install the libraries
We keep updating the code as an open-source project. You can star-mark and follow our GitHub repository to get the newest features and bug fixes. You can also share your codes with worldwide OpenCatEsp32 users.
You can check the update history information in the ChangeLog.md.
Download the OpenCatEsp32 repository from GitHub repository: https://github.com/PetoiCamp/OpenCatEsp32 We suggest you utilize GitHub’s version control feature. Otherwise, make sure you download the WHOLE OpenCatEsp32 FOLDER every time. All the codes have to be the same version to work together.
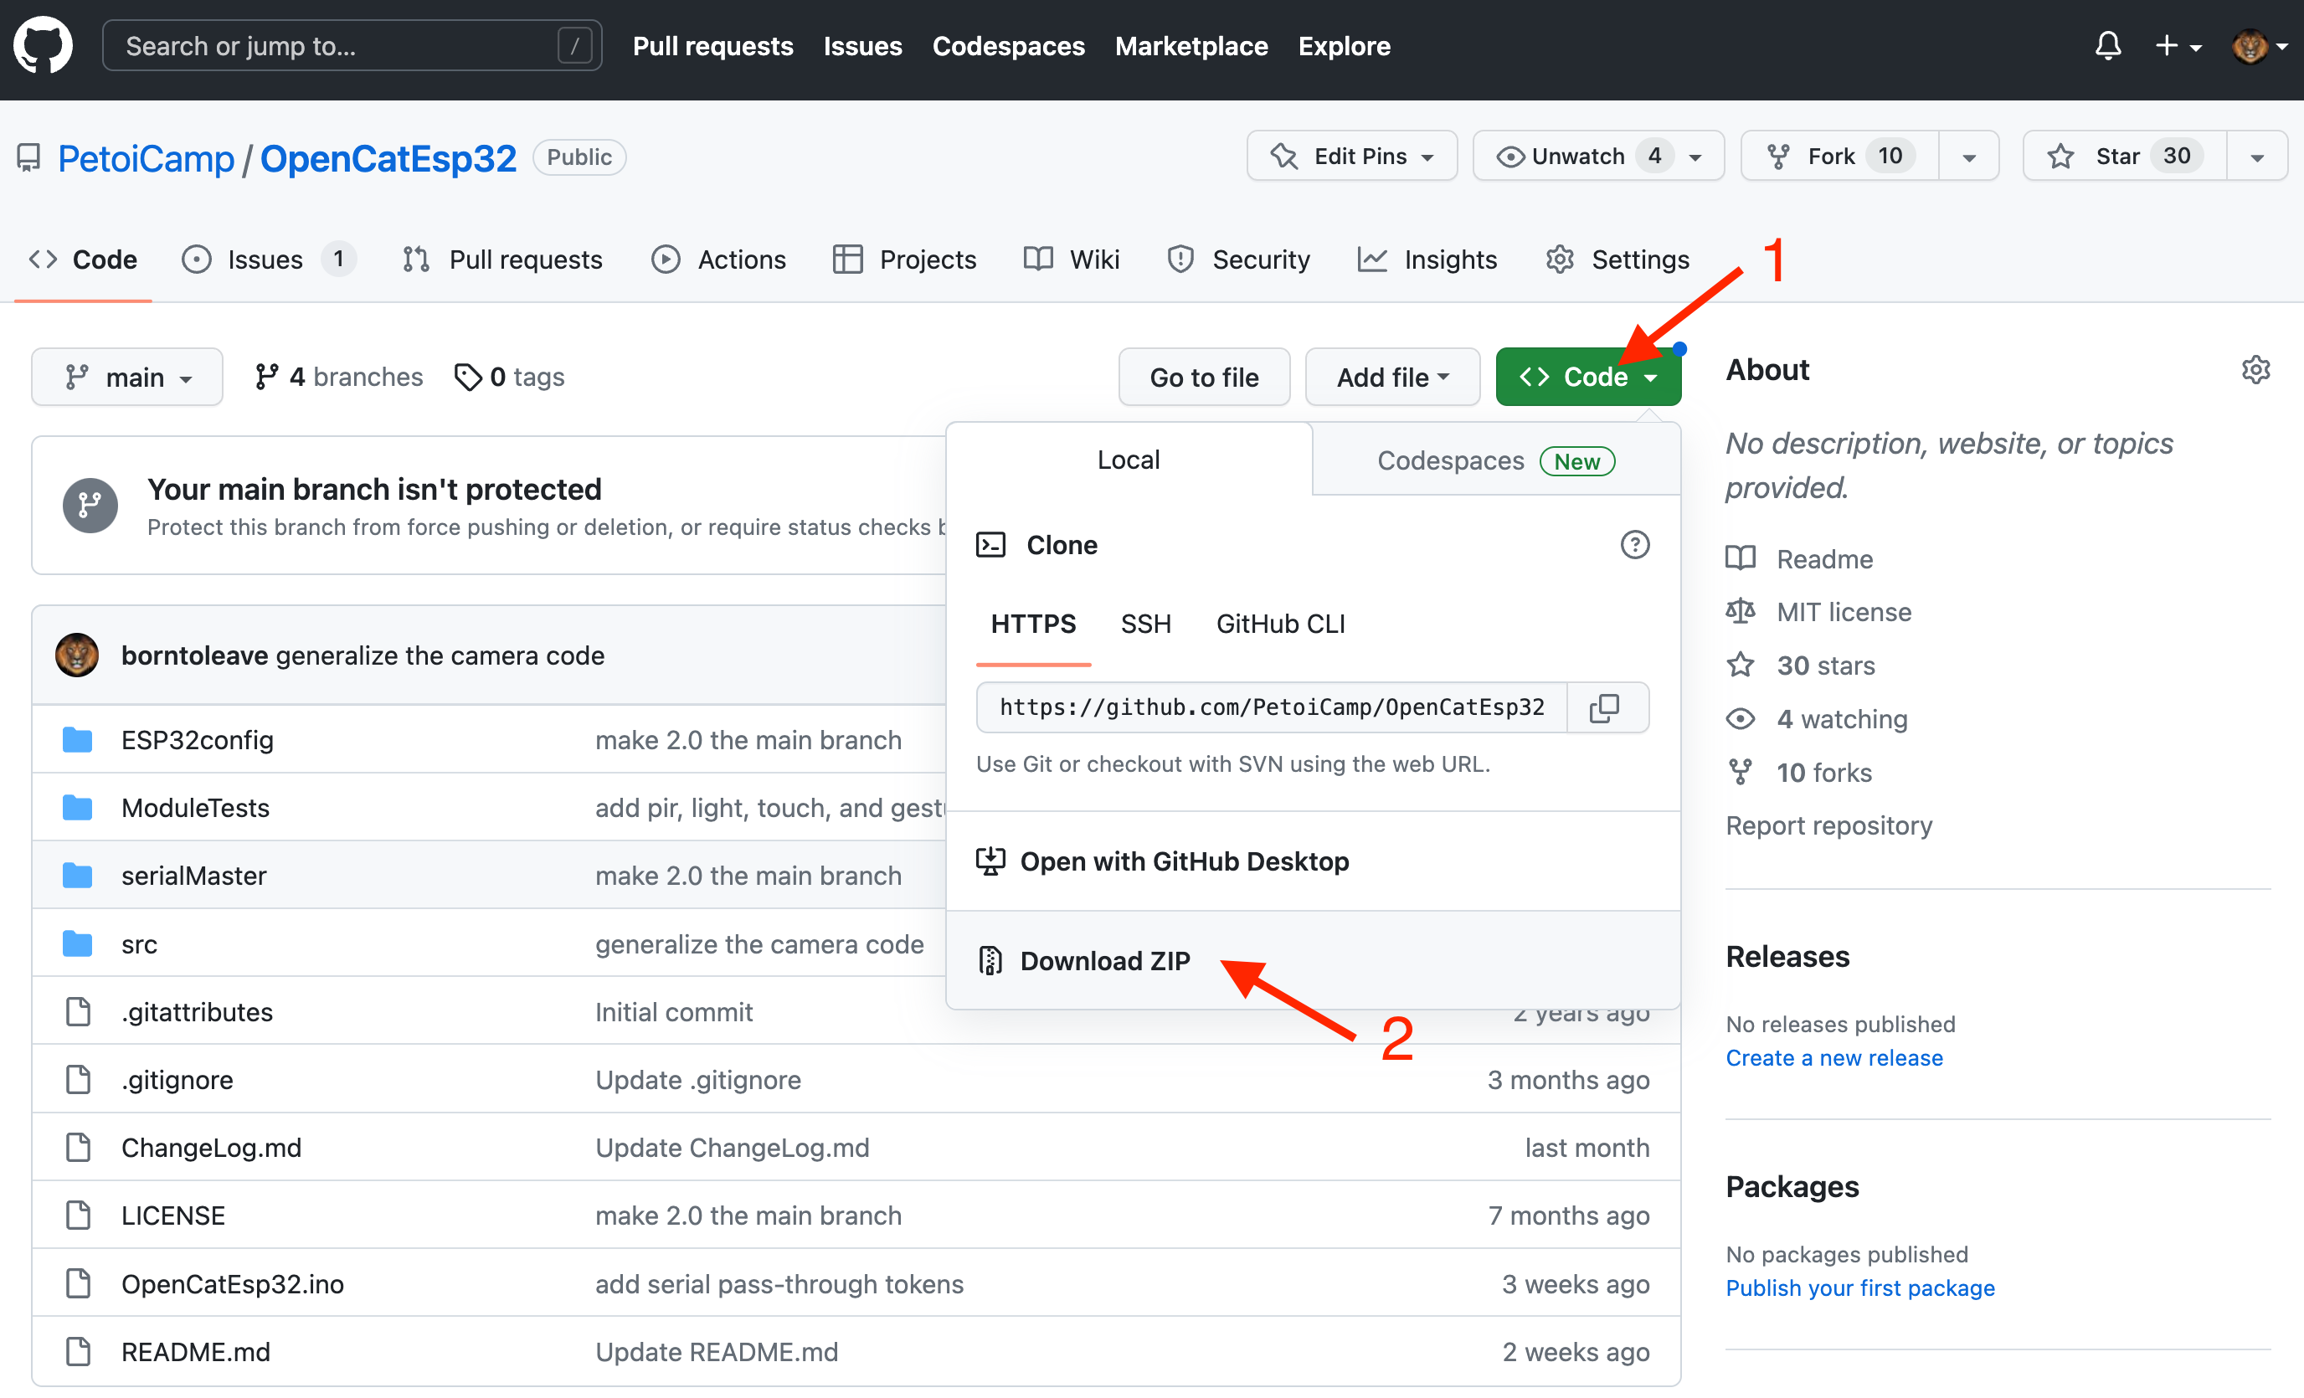
If you download the Zip file of the codes, you will get an OpenCatEsp32-main folder after unzipping. Please rename it to OpenCatEsp32 before opening the OpenCatEsp32.ino so that the two names match.
No matter where you save the folder, the file structure should be:

There are several test***.ino codes in the ModuleTests folder. You can upload them separately to test specific modules (I recommend using testBuzzer.ino as your first test sketch).
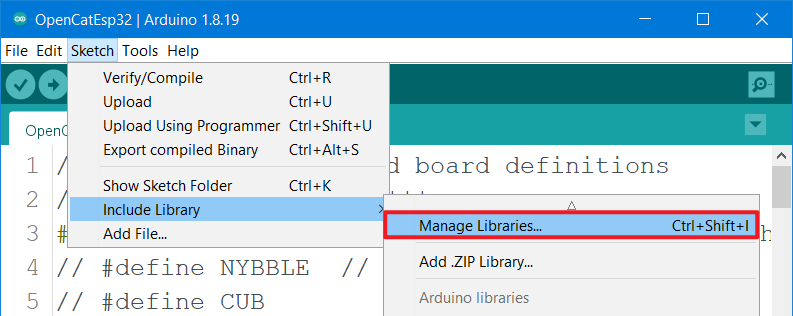
Install the libraries
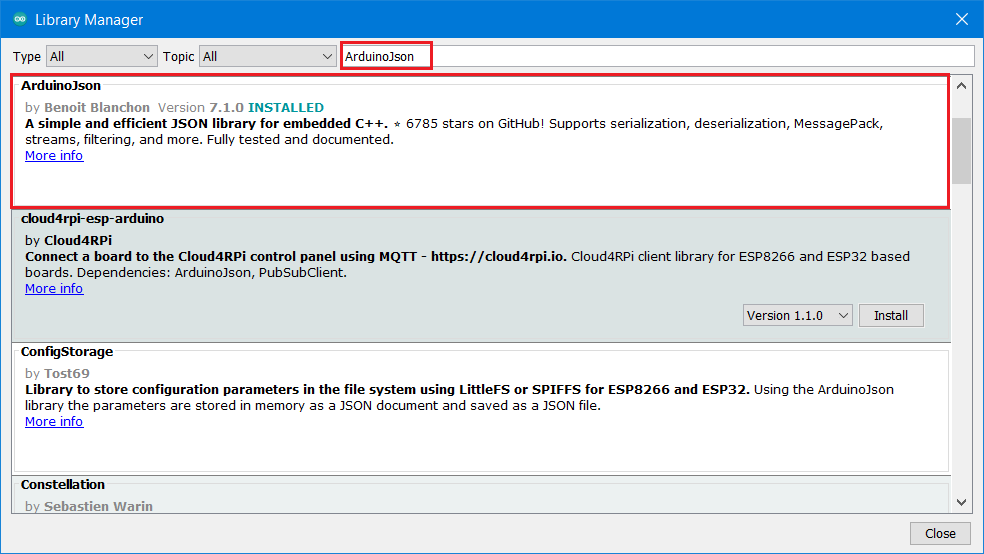
Install ArduinoJson in the Library Manager
Install WebSockets in the Library Manager.


Download firmware & Petoi Web Coding Blocks source code
Download the latest version from Github .

After the download is complete, unzip the downloaded file and rename the extracted folder "OpenCatEsp32-Quadruped-Robot" to "OpenCatEsp32".

This is because the firmware file OpenCatEsp32.ino inside must be placed in a folder with the same name.
If you skip this step and try to open OpenCatEsp32.ino directly, you will be prompted that it should be placed in a folder with the same name. This will complicate the process, and unless you are very familiar with Arduino's firmware upload procedure, we strongly do not recommend doing so.

Open the OpenCatEsp32.ino file in the folder.

Connect to BiBoard via USB type-C data cable
Set the serial port in the Arduino IDE.
(Please note : For Mac user, only choose the /dev/cu.wchusbserial port here) :

1.7 Compile and upload the firmware
Modify the product type macro definition in OpenCatEsp32.ino according to the product type you used. e.g.: Bittle
Modify the mainboard model macro definition in OpenCatEsp32.ino according to the mainboard (BiBoard) version. e.g. : using BiBoard_V1_0
If the robot(Bittle X+Arm) has the robotic arm, you should also activate the macro definition as follows:
Otherwise, please comment out this line of code.
After the modification is complete, click the Upload button (as shown below) to upload the sketch OpenCatEsp32.ino, and the changes in the code file will be automatically saved.

Last updated