The Petoi Web Coding Block allows you to control the robot via WiFi without compiling and uploading code to its main board. Simply click the "Run Code" button to execute your graphical block program, sending instructions wirelessly to the robot over your local network. The process involves three key steps:
Open the serial port
Control the robot
Close the serial port
The Petoi web coding block interface is shown below:
You can use Quick Connect to establish a WiFi connection between your computer and the robot. For the detailed connection process, please refer to the section: Connecting the Robot via WiFi
If you connect the robot to the computer via a data cable, the commands will be directly sent to the robot through the serial port during program execution.
Reset the Robot's Stored Wi-Fi Information
Press and hold the BOOT button on the robot's main board. Hold until a 10-second countdown finishes in the serial monitor output, which initiates the reset procedure.
2 Language Switch
You can switch language systems here anytime.
3 Workspace
This is the area where you assemble block programs. You can scroll the mouse wheel to zoom in/out.
Press and hold the left mouse button on a blank area to pan the view. Right-click to perform actions like undoing block operations.
Left-click and hold a block to drag its position. Right-click a block to copy or delete it.
The buttons at the bottom-right :
From top to bottom: Undo • Redo • Center View • Zoom In • Zoom Out • Trash Bin
You can drag blocks onto the Trash Bin here to delete them. Click the Trash Bin to view deletion history, the blocks inside can be dragged back to the workspace.
Alternative deletion methods:
Right-click a block → choose "delete block".
Drag blocks to the Toolbox area.
Left-click a block → press "Delete" on your keyboard.
The Workspace contains two default blocks that cannot be deleted :
Connect with IP: Essential block for program execution. Only blocks connected under it will run.
Gyroscope: Disables robot's gyroscope during program execution by default.
Robots' gyroscope status varies by users' usage habits. If it's enabled during runtime, the robot will automatically adjusts balance in real-time, which may interfere with your program's intended behavior. To ensure consistency, gyroscope is disabled at program start.
To enable: Simply change "disable" to "enable".
4 Action Buttons
Show Code: Displays source code of blocks connected under the Connect with IP block.
Run Code: Executes all blocks connected under the Connect with IP block.
Save Program: Saves current project state (all blocks + skills) as a .json file.
Load Program: Loads the .json project you saved.
Upload Skill Files: Adds skill files to project (details: xxx).
Generate Log:
Clear All: Removes all blocks except default blocks on the workspace. Cleared blocks will appear in Trash Bin history.
5 Console
You can view real-time program execution messages here. The Console is critical for wireless control, as it provides vital feedback when serial port data is inaccessible.
Use this button to toggle the timestamp display in the Console on/off. When you need to copy batches of sensor data output to the console, turning off timestamps makes it easier.
Use this button to log the serial commands sent to the robot during program execution in the console.
Use this button to display debug information.
Use this button to clear all messages in the console.
6 Serial Monitor
You can view serial print messages from connected robots here and send commands directly to the serial port.
When you successfully connect to the robot's serial port, the Serial Monitor window will automatically open as shown above.
Note:
Without a USB cable connection between the robot and computer, serial data cannot be accessed or sent here.
Use this button to connect to the serial port and open the serial monitor.
Use this button to toggle the timestamp display on/off. When you need to copy batches of sensor data output to the console, turning off timestamps makes it easier.
Use this button to close the serial monitor.
Use this button to clear all messages in the serial monitor.
7 Toolbox
Left-click any category in the Toolbox to reveal all its blocks. Drag and place them in the Workspace, then link to blocks under to assemble your program.
Blocks
Logic
The blocks in the Logic category are used for conditional judgments and logical operations. For example, you can use them to determine whether the robot encounters an obstacle and decide whether to continue moving forward or turn.
You can modify the structure of "if..." statement in the gear icon .
Loops
The blocks in the Loops category are used for handling repetitive tasks. They provide various loop structures that allow a segment of code to repeat a specified number of times or continue running until a certain condition is met.
Math
The blocks in the Math category provide a full suite of mathematical functions, ranging from basic arithmetic (addition, subtraction, multiplication, division) to advanced operations (such as trigonometric functions and random numbers). Whether calculating the robot's movement distance or generating random numbers, these blocks are essential.
Text
The blocks in the Text category are used for processing and manipulating text information (strings). You can use them to concatenate multiple text segments, calculate text length, find or extract specific content, and format text (such as converting case).
You can change the length of the list that follows in the gear icon of .
Variables
The blocks in the Variables category are used for storing and retrieving variable values. Click to create a new variable.
Once created, related blocks will appear. You can create multiple variables.
Lists
The blocks in the Lists category are used for storing multiple values to manage a set of data. You can perform operations such as adding, deleting, finding, and modifying elements in a list.
You can change the length of the list in the gear icon .
Functions
The blocks in the Functions category are used for defining functions. They allow you to encapsulate a commonly used segment of code into an independent "function" and assign it a name. Afterwards, you can call this code at any time using the function name without rewriting it.
You can add parameters to the function in the gear icon .
You can click the button to add comments to the function.
Communication
The blocks in the Communication category are used for interacting with various modules of the robot.
For detailed instructions on sensor connections, please refer to the individual sensor documentation in the "EXTENSIBLE MODULES" section. Only basic connection diagrams and pin number references are provided here for your guidance.
The pin numbers required when using building blocks can be referenced against the labels next to the Grove Sockets on your BiBoard.
For general modules (Light Sensor, Touch Sensor, Gesture Sensor, PIR Motion Sensor, IR Distance Sensor), You can use the above four blocks to digitally/analog read/write signals and see the results in both the serial monitor and console.
Analog value range: 0~255
Digital value range: High-level: 1; Low-level: 0
For the Ultrasonic Sensor, use this block to read the distance value. You can set the two pins ( Trigger and Echo) like this: (BiBoard V1 connects to the Rx and Tx pins)
For camera modules (MU Camera, Petoi AI Vision Module), use this block to Read the coordinates of the identified target from the camera module.
If you are familiar with Petoi's serial commands (e.g., m 0 60 rotates servo #0 to 60°), you can use this block to send serial commands to robot during program execution.
You can also input "kkcL" (kick the left front leg), and "khiR" (raise the right front leg to say hello). For more serial port commands, please refer to the serial protocol.
Use this block to enable/disable the robot's gyroscope:
Enabled: The robot adjusts motion balance in real-time and performs self-righting when tilted over.
Disabled: The robot executes only specified movements without auto-balancing.
Motion
The blocks in the Motion category are used for controlling robot actions and reading/writing servo joint angle signals.
Preset Actions:
This block enables the robot to execute various preset gaits for movement in various directions/poses. You can modify the delay duration for continuous walking.
This block makes the robot perform various preset poses.
This block performs advanced preset motions. Due to large movement ranges, please use cautiously especially when using with USB-connected robot or Bittle X+Arm.
This block controls preset robotic arm motions (Bittle X+Arm only).
Custom Actions:
Use these two blocks to get the robot's current joint angles. You can assign it to a variable first and then use the variable and algorithm to control other joints to rotate.
The return value of the blocks are only angle values, which cannot be filled in the "Turn sequentially" and "Turn simultaneously" blocks alone.
These two blocks can both set a single joint angle individually. You can set the joint angle to an absolute value, or to a relative angle value. increase it, or decrease it by a specific number.
You can even creatively make the angle change using a formula or variable instead of a fixed number.
Combine these four blocks to move multiple joints sequentially or simultaneously.
You can click the gear icon, then change the list length in the pop-up window to apply it to the actual block.
Use these two blocks to control all joints to rotate at the same time.
The "Action frame" block represents a list of 16 angle values. Each angle value corresponds to the absolute angle value to which the corresponding joint index servo rotates.
This block executes uploaded skill files by entering the full filename (e.g., test.md).
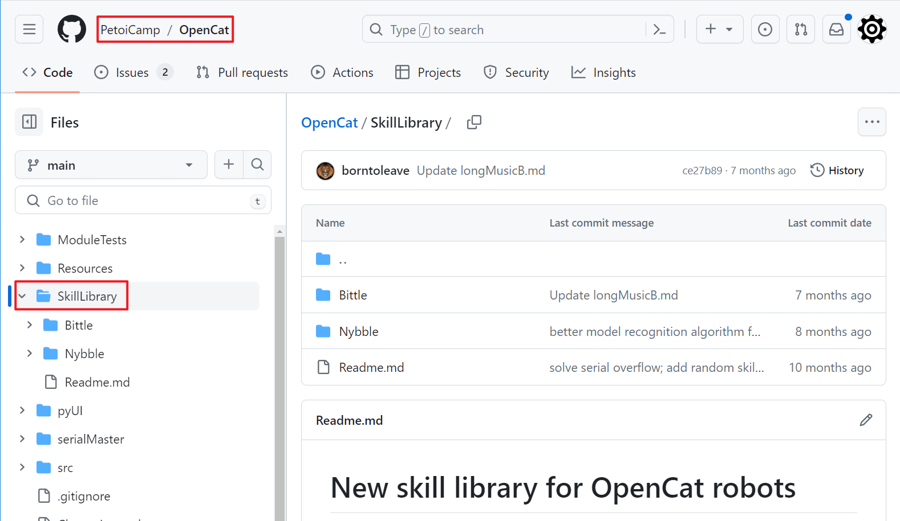
Tips: you can also copy & paste the SkillLibrary folder from the source code of the OpenCat project on GitHub to the .config/Petoi directory. Therefore, you can use some sample skills for your program, and there is no need to use the export function in the Skill Composer.
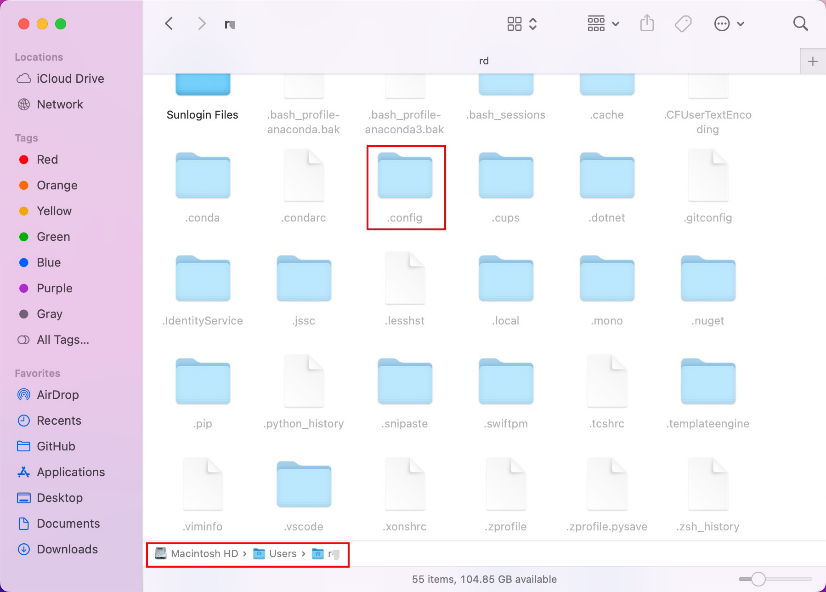
The folder .config is a hidden directory on MacOS/Linux but can be visited in the terminal or through a specific view setting:
MacOS
open the directory /Users/{username} in Finder, then press the “Command” + “Shift” + “.” (period) keys at the same time.
Console
Use this block to add console output, to observe runtime status and test programs in the console.
When the program executes this block, the console will print "Please input:" and display an input box below it, allowing you to enter information into the program.
Use this block to insert a delay after statement execution, to observe program flow or achieve timing effects.
You can send a serial command via this block
You can describe functionality in natural language. AI will generate the corresponding block code.
Music
You can combine these two blocks to make the robot play continuous melody.
You can use this block to directly input a list of notes and play a melody.
The list consists of one or more pairs of Tone + Duration, the specific format is as follows:
You may use the play note block alone, but please note:
Petoi web blocks send instructions one by one in real-time over the network; using only play note during network congestion may cause discontinuous tones. Unless this effect is desired, we recommend using both blocks together for smooth melody playback.
The source code includes Wi-Fi Manager functionality, which is commented out by default for ease of use by general users. For advanced users who require this feature, you may uncomment the relevant sections to enable it.
You need to Download and install the WiFiManager library into the Arduino IDE for the related functions to work properly.
During the program’s runtime, press the BOOT button to reboot the robot and start the Wifi Manager. It will create a Wi-Fi hotspot with your machine-specific name. Connect it in your system’s Wifi settings, and a Wifi configuration page will automatically open to let you connect to your router. Only a 2.4G network is supported. The personal hotspot of your smartphone is also applicable, but you must connect your computer to the same hotspot during later operations. If the Wi-Fi configuration doesn’t open automatically after 5 seconds, you can try to connect to 192.168.4.1 manually in your browser. Alternatively, you can enter the Wifi credential in the serial monitor, formatted as “w%wifiname%password”. Click the Quick Connect button on the block coding page to enter the Wifi credentials.
If the Wifi connection is established successfully, the robot will automatically connect to the same router every time after reboot. If it fails, it won’t auto-connect during the future reboot. You can start over the connection operation as your first operation.
To clear the previously saved Wi-Fi credentials, hold the BOOT button for more than 2 seconds. This will reboot and start the Wi-Fi manager to connect to a new router.


 on the workspace. Cleared blocks will appear in Trash Bin history.


 to assemble your program.


 .
.


 You can also input "kkcL" (kick the left front leg), and "khiR" (raise the right front leg to say hello). For more serial port commands, please refer to the serial protocol.


 , then change the list length in the pop-up window to apply it to the actual block.