> For the complete documentation index, see [llms.txt](https://guide.petoi.com/llms.txt). Markdown versions of documentation pages are available by appending `.md` to page URLs; this page is available as [Markdown](https://guide.petoi.com/product/bittle-x-v2+arm/control-and-program/petoi-desktop-app/firmware-uploader.md).

# Firmware Uploader

Robot's brain is in the firmware.  Robots desire to have the most updated brain!

Please refer to [the introduction](/product/bittle-x-v2+arm/control-and-program/petoi-desktop-app.md) for installing the Petoi Desktop App and connecting the robot to your computer.

## Upload the firmware using Petoi Desktop app

### Open Petoi Desktop App

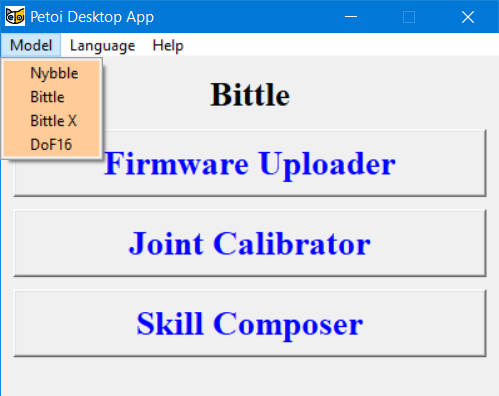
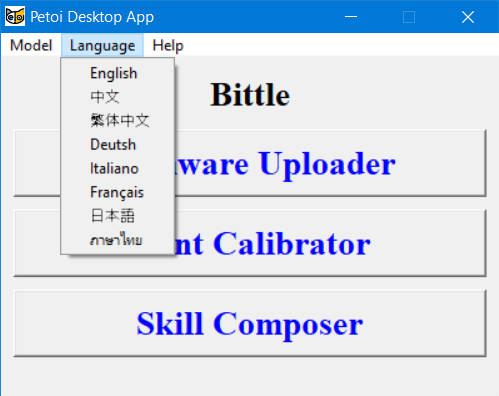
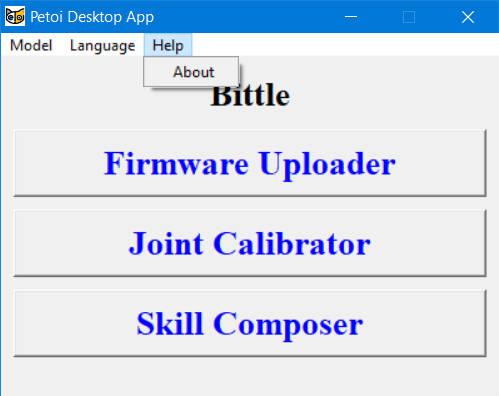
**After** properly connecting the mainboard with the computer via a USB data cable, open the PetoiDesktopApp (for Windows: UI.exe / for Mac: Petoi Desktop App), and select your **Model** and **Language**.

#### Menu bar in Petoi Desktop APP

<div align="left"><img src="https://content.gitbook.com/content/XLpFdG7mubqEHWylLK3w/blobs/bB00Tlzzl8nvZxzrz1Lu/Model_UI.jpg" alt="Model"> <img src="https://content.gitbook.com/content/XLpFdG7mubqEHWylLK3w/blobs/mtmtpLYl0OR2L0tcLzee/Language_UI.jpg" alt="Language"> <img src="https://content.gitbook.com/content/XLpFdG7mubqEHWylLK3w/blobs/p5xgMwocijNptcazftyc/About_UI.jpg" alt="Help"></div>

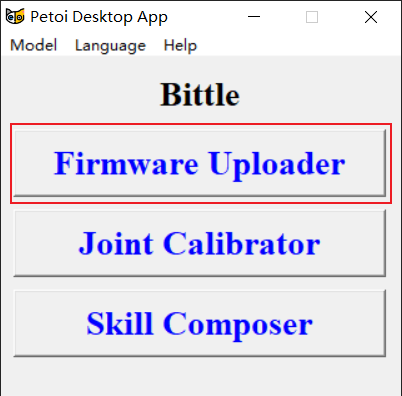
### Click the Firmware Uploader button

<div align="center"><img src="https://content.gitbook.com/content/XLpFdG7mubqEHWylLK3w/blobs/hpn9JeFMQ7qSqToCuQKR/Main_FU-en.png" alt="Main interface"></div>

### Auto Detect the Serial Port&#x20;

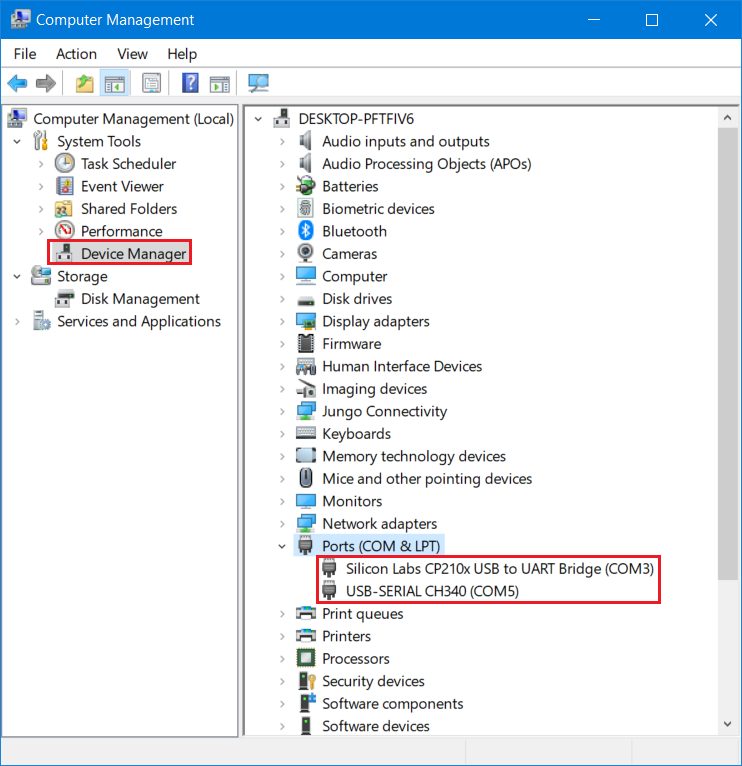
If there is **no** serial port or **more than one** serial port is detected by the desktop app:

<figure><img src="https://content.gitbook.com/content/XLpFdG7mubqEHWylLK3w/blobs/1wqH7WusIgksqniMhP5C/image.png" alt=""><figcaption></figcaption></figure>

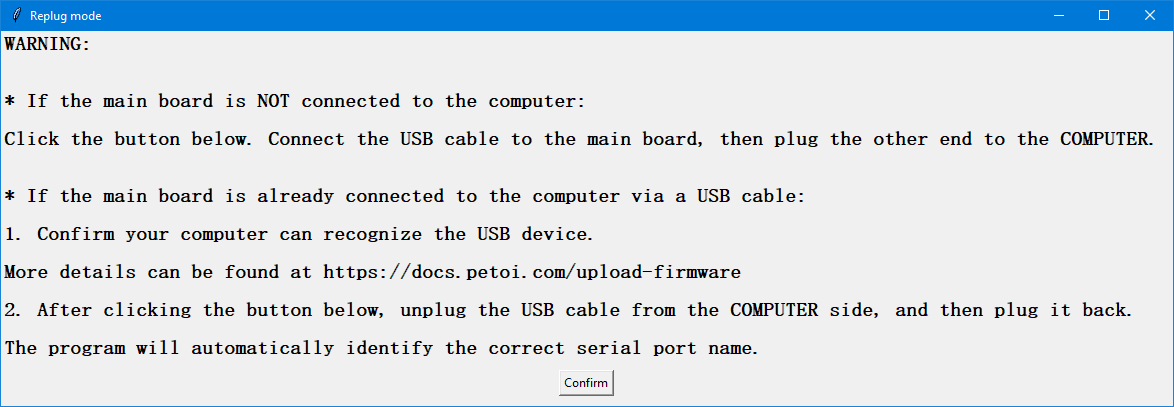
After clicking the **Firmware Uploader** button,  there will be a message box prompt as follows:

<figure><img src="https://content.gitbook.com/content/XLpFdG7mubqEHWylLK3w/blobs/ywtnkftOgnVrD6ETRXqW/image.png" alt=""><figcaption></figcaption></figure>

Please follow the prompts in the message box. \
After clicking the **Confirm** button, If you complete the prompts within 10 seconds, the desktop app will automatically identify the serial port name connecting the robot to the computer.\
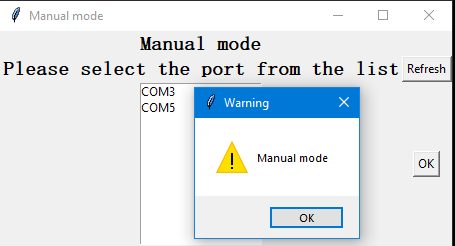
If you complete the operation of unplugging and plugging the USB interface on the computer for more than 10 seconds, the desktop application will enter the manual selection of the serial port name mode：

<figure><img src="https://content.gitbook.com/content/XLpFdG7mubqEHWylLK3w/blobs/bgivDPu6e2sEkAOG9Zw2/image.png" alt=""><figcaption></figcaption></figure>

Click the **OK** button in the Warning message box first, then you can refresh the serial port list or select one of them (e.g. **COM3**) and click the **OK** button in the **Manual mode** window to open the Firmware Uploader interface as follows:

<figure><img src="https://4130507397-files.gitbook.io/~/files/v0/b/gitbook-x-prod.appspot.com/o/spaces%2FXLpFdG7mubqEHWylLK3w%2Fuploads%2Fvc9nWGOk7grrInNec169%2Fimage.png?alt=media&amp;token=bb9ca4fa-79d3-4094-8c47-fd014fd35399" alt=""><figcaption></figcaption></figure>

Once the Firmware Uploader interface is opened, you can also unplug and replug the USB cable from the COMPUTER side. The desktop app will automatically identify the serial port name used to connect the robot to the computer.

<figure><img src="https://4130507397-files.gitbook.io/~/files/v0/b/gitbook-x-prod.appspot.com/o/spaces%2FXLpFdG7mubqEHWylLK3w%2Fuploads%2Fcl5qlJ1NiNbKtnvillYb%2Fimage.png?alt=media&amp;token=ae9c09cf-dd8a-4e2d-8410-10ec47084c9b" alt=""><figcaption></figcaption></figure>

If you unplug the **COM5** and replug it on the computer side, it will be discovered by the desktop app as follows:

<figure><img src="https://4130507397-files.gitbook.io/~/files/v0/b/gitbook-x-prod.appspot.com/o/spaces%2FXLpFdG7mubqEHWylLK3w%2Fuploads%2FlNN0uGcVo9pK6u6xVKni%2Fimage.png?alt=media&amp;token=4abee5a1-c85d-43c1-8fb3-d35232dc810b" alt=""><figcaption></figcaption></figure>

<figure><img src="https://4130507397-files.gitbook.io/~/files/v0/b/gitbook-x-prod.appspot.com/o/spaces%2FXLpFdG7mubqEHWylLK3w%2Fuploads%2F1P35AKPQvkW1RWzabK4r%2Fimage.png?alt=media&amp;token=04a2fd30-4895-4889-a71f-26379a8cf919" alt=""><figcaption></figcaption></figure>

<figure><img src="https://4130507397-files.gitbook.io/~/files/v0/b/gitbook-x-prod.appspot.com/o/spaces%2FXLpFdG7mubqEHWylLK3w%2Fuploads%2FYPxlxwartRbibDapB12C%2Fimage.png?alt=media&amp;token=fc278d40-2dae-4fb3-8122-8064bb974a7c" alt=""><figcaption></figcaption></figure>

### Select the correct options to upload the latest firmware.&#x20;

{% hint style="warning" %}
The 1.0 software won't work correctly with the Joint Calibrator, the Skill Composer, and other APIs. Use it only when you want to use the CodeCraft, a graphical coding interface provided by our partner, TinkerGen.&#x20;
{% endhint %}

<table><thead><tr><th width="176">Options</th><th width="293">Values</th><th>Notes</th></tr></thead><tbody><tr><td>Product</td><td><p>Bittle (default)</p><p>Bittle X</p><p>Bittle X+Arm<br>Nybble<br>Nybble Q</p></td><td></td></tr><tr><td>Mode</td><td>Standard (default)<br>RandomMind <br>Voice<br>Mind+<br>Camera <br>Ultrasonic <br>RandomMind_Ultrasonic<br>Light<br>Touch<br>PIR<br>Gesture<br>IR distance</td><td><p>Because <strong>Bittle X running on BiBoard</strong> has more memory space, you only need to upload with the <strong>Standard</strong> mode firmware.  Then you can switch between different modes via serial port commands. [1]</p><p></p><p>For NyBoard, these 12 modes can be selected. All of these modes apply to both <strong>Bittle</strong> and <strong>Nybble</strong>.</p><p></p></td></tr><tr><td>Software version</td><td><p>2.0 (default)</p><p>1.0</p></td><td>The 1.0 version is obsolete.</td></tr><tr><td>Serial port</td><td>Auto detection or by manual selection. </td><td>You can find the correct one through unplug and replug the USB socket on the computer side</td></tr><tr><td>Board version</td><td><p>NyBoard_V1_0 (default<em>)</em><br>NyBoard_V1_1<br>NyBoard_V1_2<br>BiBoard_V0_1</p><p>BiBoard_V0_2<br>BiBoard_V1_0</p></td><td>BiBoard_V0_1 or BiBoard_V0_2  is for <strong>Bittle X.</strong>  <br>BiBoard_V1_0 is for <strong>Bittle X V2</strong> and <strong>Nybble Q</strong>.</td></tr></tbody></table>

{% hint style="info" %}
\[1] You can use the serial commands to [switch modes](https://guide.petoi.com/product/bittle-x-v2+arm/control-and-program/petoi-desktop-app/pages/8ajuxMEplUPiNYi4SRyi#id-2.9-switch-working-mode-via-the-serial-commands-optional) for **BiBoard**:\
For **BiBoard,** Mind+ mode is supported by default, so it doesn't require a serial command to switch on.\
You can learn about the functionw of each module through the [**EXTENSIBLE MODULES**](https://guide.petoi.com/extensible-modules/introduction).
{% endhint %}

{% hint style="warning" %}
There's no correlation between the board (hardware) version and the code (software) version.
{% endhint %}

### Uploading options

* **Factory Reset**\
  After upgrading the firmware, the board will enter the [**initialization startup mode**](https://guide.petoi.com/arduino-ide/upload-sketch-for-biboard#id-2.8-program-initialization) and ask whether to clear the joint calibration parameters and calibrate the IMU.
* **Upgrade the Firmware**\
  It will upgrade the firmware, skip the steps of clearing joint calibration parameters and the IMU calibration(it's equivalent of sending serial command "**n**"), and automatically enter the [**regular startup mode**](https://guide.petoi.com/arduino-ide/upload-sketch-for-biboard#id-2.8-program-initialization).
* **Update the Mode Only**\
  It has the same function as the **Upgrade the Firmware** at present.

#### **Factory reset** process

After clicking the **Factory Reset** button, the uploading process will start immediately. The board will enter the [**initialization startup mode**](https://guide.petoi.com/arduino-ide/upload-sketch-for-biboard#id-2.8-program-initialization) after uploading the firmware. Some message windows will pop up in sequence for you to confirm or cancel:

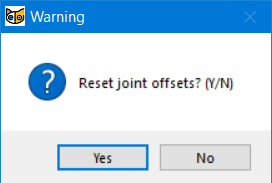
1. Reset joint offsets? (Y/N)<br>

   <figure><img src="https://content.gitbook.com/content/XLpFdG7mubqEHWylLK3w/blobs/6p3qrpQErPAdVthqJgbc/image.png" alt=""><figcaption></figcaption></figure>

Select **Yes**, and the program will reset all servo calibration parameters to zero. The status bar will update the corresponding process and result in real time.

Select **No** to preserve the calibration value(so that you don't need to calibrate again if you have already done so). &#x20;

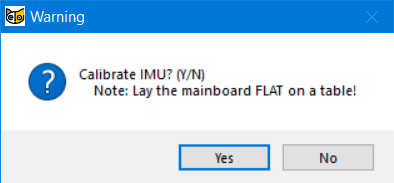
2. Calibrate IMU? (Y/N)<br>

<figure><img src="https://content.gitbook.com/content/XLpFdG7mubqEHWylLK3w/blobs/z6XYApx4aPBULAA3chub/image.png" alt=""><figcaption></figcaption></figure>

Select **Yes**,  and the program will calibrate the gyroscope (IMU) to balance the robot correctly. The status bar will update the corresponding process and result in real time.

Select **No**, and the program will skip this step.

After that, the board will enter the [**regular startup mode**](https://guide.petoi.com/arduino-ide/upload-sketch-for-biboard#id-2.8-program-initialization)**.**

{% hint style="danger" %}
Note:&#x20;

Ensure the microcontroller is positioned horizontally for IMU calibration before clicking the "Yes" button.&#x20;
{% endhint %}

### Finish uploading the firmware

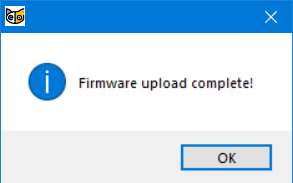
After the upload, the status bar will update the corresponding result, such as the success or failure of firmware uploading. If the uploading is successful, a message window of "Firmware upload complete!" will pop up simultaneously.

<figure><img src="https://content.gitbook.com/content/XLpFdG7mubqEHWylLK3w/blobs/gmlytoF0Snk0Xw0AfwtY/image.png" alt=""><figcaption></figcaption></figure>

{% hint style="info" %}
Note:&#x20;

1. For NyBoard, when you open the software and upload the firmware for the first time, the program will first upload the "**Parameters**" firmware and then the "**Main function**" firmware.&#x20;
2. After uploading the firmware, if the NyBoard or BiBoard V1 is not connected to the battery and powered on, you will hear repetitive descending melodies, indicating that the battery is low or disconnected. You need to connect the battery and turn on its power.&#x20;
   {% endhint %}

### Check the log file

From the desktop app version **1.2.7**, the log information will be output in the console box at the bottom of the interface:

<figure><img src="https://4130507397-files.gitbook.io/~/files/v0/b/gitbook-x-prod.appspot.com/o/spaces%2FXLpFdG7mubqEHWylLK3w%2Fuploads%2F7EAR5eoWzcqDrBaWWAGc%2Fimage.png?alt=media&amp;token=77d377df-be80-44ef-b434-dd017d340bfb" alt=""><figcaption></figcaption></figure>

You can directly click the **Copy** button to copy all the log information, or you can first select specific key information in the console output box with your mouse, then click the **Copy** button to copy only that portion of the log information, and then paste this information into an email and send it to support.petoi.com for assistance.

{% hint style="info" %}
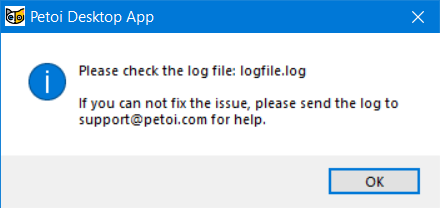
For the old version of the desktop app, if the upload fails, the following message box will pop up:

<img src="https://content.gitbook.com/content/XLpFdG7mubqEHWylLK3w/blobs/H2tNQBrzblE6pkZU8JRi/image.png" alt="" data-size="original">

the log file is located at:

* For Windows: The log file is in the same directory as **UI.exe**

  ![](https://docs.petoi.com/~gitbook/image?url=https%3A%2F%2F1565080149-files.gitbook.io%2F%7E%2Ffiles%2Fv0%2Fb%2Fgitbook-x-prod.appspot.com%2Fo%2Fspaces%252F-MQ6a951Q6Jn1Zzt5Ajr-887967055%252Fuploads%252FNl61Gr6RNtDYEuJek7Gm%252Fimage.png%3Falt%3Dmedia%26token%3D0e0ea071-11e4-48e7-9f80-cbfbca10ccac\&width=768\&dpr=4\&quality=100\&sign=996aee40\&sv=2)
* For macOS: You can check the log file as follows:

  ![](https://docs.petoi.com/~gitbook/image?url=https%3A%2F%2F1565080149-files.gitbook.io%2F%7E%2Ffiles%2Fv0%2Fb%2Fgitbook-x-prod.appspot.com%2Fo%2Fspaces%252F-MQ6a951Q6Jn1Zzt5Ajr-887967055%252Fuploads%252FGLeXErV4KpBrfbJQhO3o%252Fimage.png%3Falt%3Dmedia%26token%3Dee485581-cf60-4008-aba7-5c4a91b16ee3\&width=768\&dpr=4\&quality=100\&sign=d6a8daf1\&sv=2)![](https://docs.petoi.com/~gitbook/image?url=https%3A%2F%2F1565080149-files.gitbook.io%2F%7E%2Ffiles%2Fv0%2Fb%2Fgitbook-x-prod.appspot.com%2Fo%2Fspaces%252F-MQ6a951Q6Jn1Zzt5Ajr-887967055%252Fuploads%252FL7O8qDstl6NwlwRQ4ZmJ%252Fimage.png%3Falt%3Dmedia%26token%3D972abd2e-b715-4f05-8601-baa99d22ad17\&width=768\&dpr=4\&quality=100\&sign=a61fc3b5\&sv=2)

When you contact our **<support@petoi.com>**, please attach the log file to your email.
{% endhint %}

### Run Firmware Uploader in the terminal

{% hint style="info" %}
There may be some OS platform compatibility issues with different computers.

You can still run the app directly from your terminal:

1. Go to OpenCat/pyUI/ in your terminal.
2. Install **PySerial** and **Pillow** for your Python installation. You may get a clean Anaconda environment and `pip3 install pyserial pillow`
3. Run `python3 UI.py`

For **NyBoard**, the firmware uploader calls the application **avrdude** to upload firmware files to the microcontroller.&#x20;

For **BiBoard**, the firmware uploader calls the application **esptool** to upload firmware files to the microcontroller.&#x20;

**Linux OS**

For Linux system users, in addition to the above steps, you also need to perform the following steps:

1\. Install **avrdude**&#x20;

* Fedora: dnf install avrdude
* CentOS: yum install avrdude
* Debian / Ubuntu: apt install avrdude

2\. Modify the variable **avrdudeconfPath** in FirmwareUploader.py

* Fedora / CentOS : `avrdudeconfPath = '/etc/avrdude/'`
* Debian / Ubuntu : `avrdudeconfPath = '/etc/'`
  {% endhint %}

{% hint style="info" %}
If you have experience with the Arduino IDE, you will see the same log message when uploading.

* For the BiBoard, please review the [Upload Sketch for BiBoard](/arduino-ide/upload-sketch-for-biboard.md).
* For the NyBoard, please review the [Upload Sketch for NyBoard](/arduino-ide/upload-sketch-for-nyboard.md).
  {% endhint %}


---

# Agent Instructions
This documentation is published with GitBook. GitBook is the documentation platform designed so that both humans and AI agents can read, navigate, and reason over technical content effectively. Learn more at gitbook.com.

## Querying This Documentation
If you need additional information that is not directly available in this page, you can query the documentation dynamically by asking a question.

Perform an HTTP GET request on the current page URL with the `ask` query parameter, and the optional `goal` query parameter:

```
GET https://guide.petoi.com/product/bittle-x-v2+arm/control-and-program/petoi-desktop-app/firmware-uploader.md?ask=<question>&goal=<endgoal>
```

`ask` is the immediate question: it should be specific, self-contained, and written in natural language.
`goal` is optional and describes the broader end goal you are ultimately trying to accomplish on behalf of the user. GitBook uses it to tailor the answer towards what is most useful for that goal.

The response will contain a direct answer to the question and relevant excerpts and sources from the documentation.

Use this mechanism when the answer is not explicitly present in the current page, you need clarification or additional context, or you want to retrieve related documentation sections.